
Happy Valentines day. I hope you are all well. It has been such a long time since I posted and I am sorry to have been away so long, but it took me quite a while to get over my neck and back pain. I am much better now, but I am still being careful...no more ballrooms!
I have started working on miniatures again, finally, and what better way to come back to blogging then doing what I do best...starting a room over. This time I present to you the final version of the manor's dining hall.

Before you have me declared insane, let me explain.
Here it is last version of the dining room:

I did like the Dining room before, but many people commented that the veins in my marble were too big. With time it really bother me. Also, I thought the doorcases I made were nice, but they were a bit too big for the space. Another reason was I was not happy with the height at which the border in the wallpaper separated the top and bottom pattern. For these reasons, the room had to go.
And here it is today:


Demolition and reframing
I started by ripping out all the molding in the room except for the coffered ceiling.

The room is 14 inches high and the wallpaper was 11 inches high. This meant that the border separating the 2 patterns was at 6 inches from the ground. It split the room in a very odd way that looked wrong, but I loved the top of the paper so I just lived with it. Then one day, Les Chinoiserie reissued the Avignon wallpaper without the bottom lattice pattern. It was a sign!
My inspiration for the new room came from Holkham Hall and the rooms of Robert Adam. I decided to install a niche to the right of the door that leads to the Tudor hall. I used my Dremel to cut out a rough opening in the 5/8 MDF wall.

The ceiling stayed, but I did not like that the coffered part stuck out from the ceiling...

…so I used single and double ply illustration board to make the sides of the ceiling flush with the coffered section.

The last step was covering the walls in illustration board because I was afraid any imperfections where I removed molding and ripped the old wallpaper would show when the new one was installed.

The new paper was only the one pattern, but it was still too short for the room so I decided to add paneling 3 1/2 inch high.

The Ceiling
I added some would strips which I painted to accommodate the moldings I planned on adding

To cover the gap between the coffered section and the sides I used a paneled Frieze, under that I installed a cornice, then I re-installed the original frieze that was in the dining room, and finished that with a molding from that matched the new doorcases

The doorcases
The next step was creating the doorcases. I wanted to use Sue Cooks Adam doorcases so I drew up some plans and she was kind enough to make custom size doorcases for me. 2 of the door openings are 4" x 8", and a third one is 2 1/2" x 8".

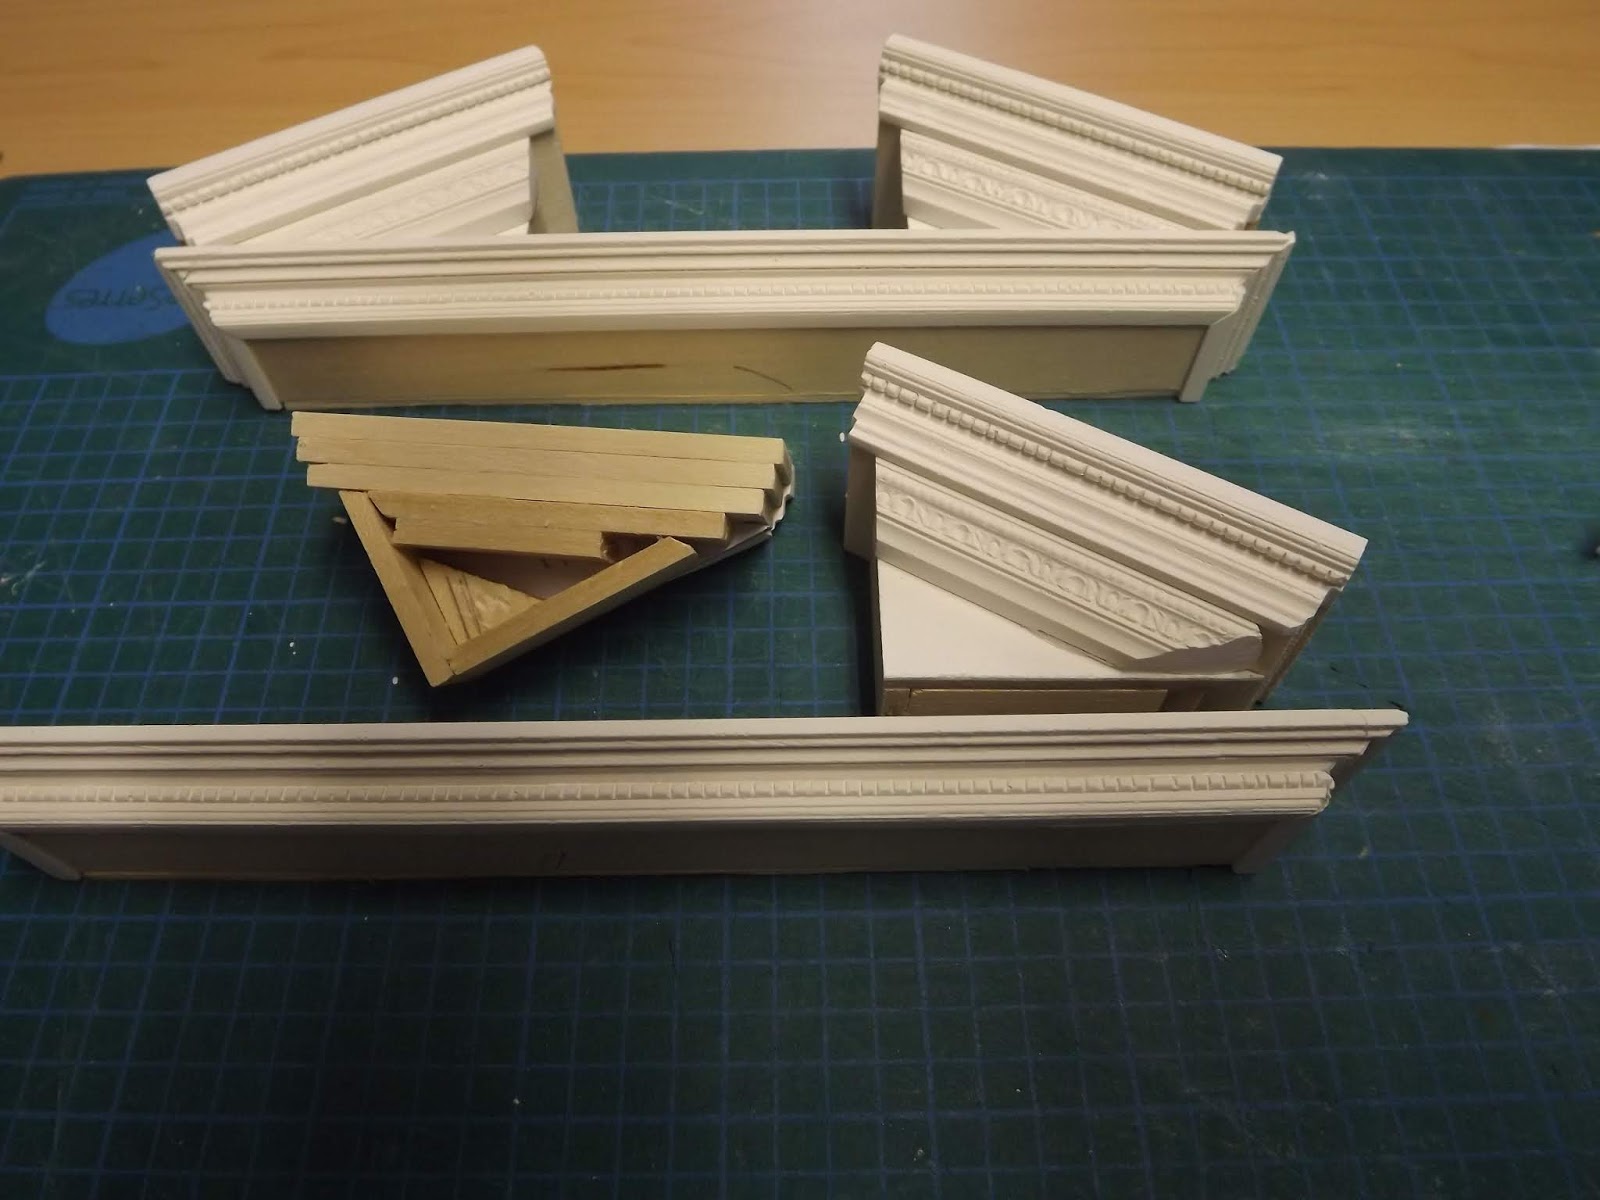
For the broken pediment, I used basewood strips and illustration board to create the triangle bases...

...then I covered them in smaller cornice moldings.
In the next picture you can see the painted elements for the doorcase. As I mentioned Sue made the custom doorcases using the 3 piece doorcase and an additional 3 piece architrave, and I made the 3 piece broken pediment.

And here it is installed:

After the doorcase were in place, I installed the paneling I made out of double ply illustration board and quarter round molding, and I installed the painted niche. I liked it, but the broken pediment was too square...

...so I added some half brackets that match the doorcase. I originally planned on putting a bust atop each door...

...but they did not look right so I ordered some pineapple finials and painted them to match. I figured since the pineapple is the symbol of hospitality it was the perfect touch


The door that leads to the breakfast room is much smaller, so I used a simpler version of the doorcase design.

Later on you will see a smaller pineapple finial atop that door.
If you look through the doorcase of the back wall at just the right angle you can see into the kitchen. The noise from the kitchen would have been disturbing, so I decided to add a second door.

I used illustration board backed with basewood strips and covered in a white molding and matching wallpaper on one side...

...and walnut painted molding and matching tiles for the kitchen side.

You can barely see it, but it is there..

Fireplace, statues and a table.
I had a William Kent fireplace and found a picture of the real version which was being auctioned at Chatsworth house. I used the picture to finish the fireplace to look like stone...no veins this time.

The insert has Terry Curran's Fable Set tiles. I love it!

I decided to put less furniture in the room to make it look grandeur. Sine I removed the piano, I glued a bracket to support a bust and a sculpture in the niche.


I decided to use the china cabinets elsewhere in the manor and purchased a second sideboard for the back wall. I was trying to choose some paintings by Canaletto to go over them, but I liked the bracket so much I had a dry run to see what I liked best.

The brackets and sculptures were the winner. I think they look very elegant and they don't take the attention away from my silverware and china.

Since the larger furniture would not be going back in, I started looking for a smaller sideboard to go next to the fireplace. I found nothing! I had 2 bar stools that were falling apart, so I decided to make a small table until I could find something I like.

The marble top is 2 layers of illustration board with a chair rail molding. I painted the marble with a brush, not a sponge. First I stippled on 3 different shades of base color, then I added veins, and I finished with a wash of 1 part paint to 5 parts water. There are about 9 coats of glaze on it which was rubbed with 0000 steel wool and waxed. The base is basewood, legs from the stools and a quarter round molding.

I think it is my best marble. I like it enough that finding a mahogany replacement is not such a priority anymore.

And that, my friends, is all. Here are some pictures of the finished room with and without furniture.


For those who are wondering where to get any of the items in this room, all the plasterwork (fireplace, doorcases, cornices, brackets, sculptures...) are from Sue Cook Miniatures , the resin Rococo frieze is from Lawbre ,and the lighting is from The Getzans.
I think some people who like Victorian style will prefer the previous version of the room, but as I have mentioned before my tastes have changed over time and I am more interested in Georgian, neo-classical and Palladian interiors. One thing is for sure, this room is final. The lighting fixtures have been soldered into place so there is no going back.
My next project will be the banquet hall and new statue gallery addition. I will try not to wait so long before posting, but preperation for those rooms will take a while.
Thank you once again for following my adventures, and a special thank you to those who contacted me because I was gone so long. I really appreciate it. I think some of your posts do not show up in my reading list for some odd reason, so if I haven't been commenting please let me know.
Big hugs to all,
Giac